Using an LED Ring with Raveberry
November 28, 2021 - Reading time: 6 minutes
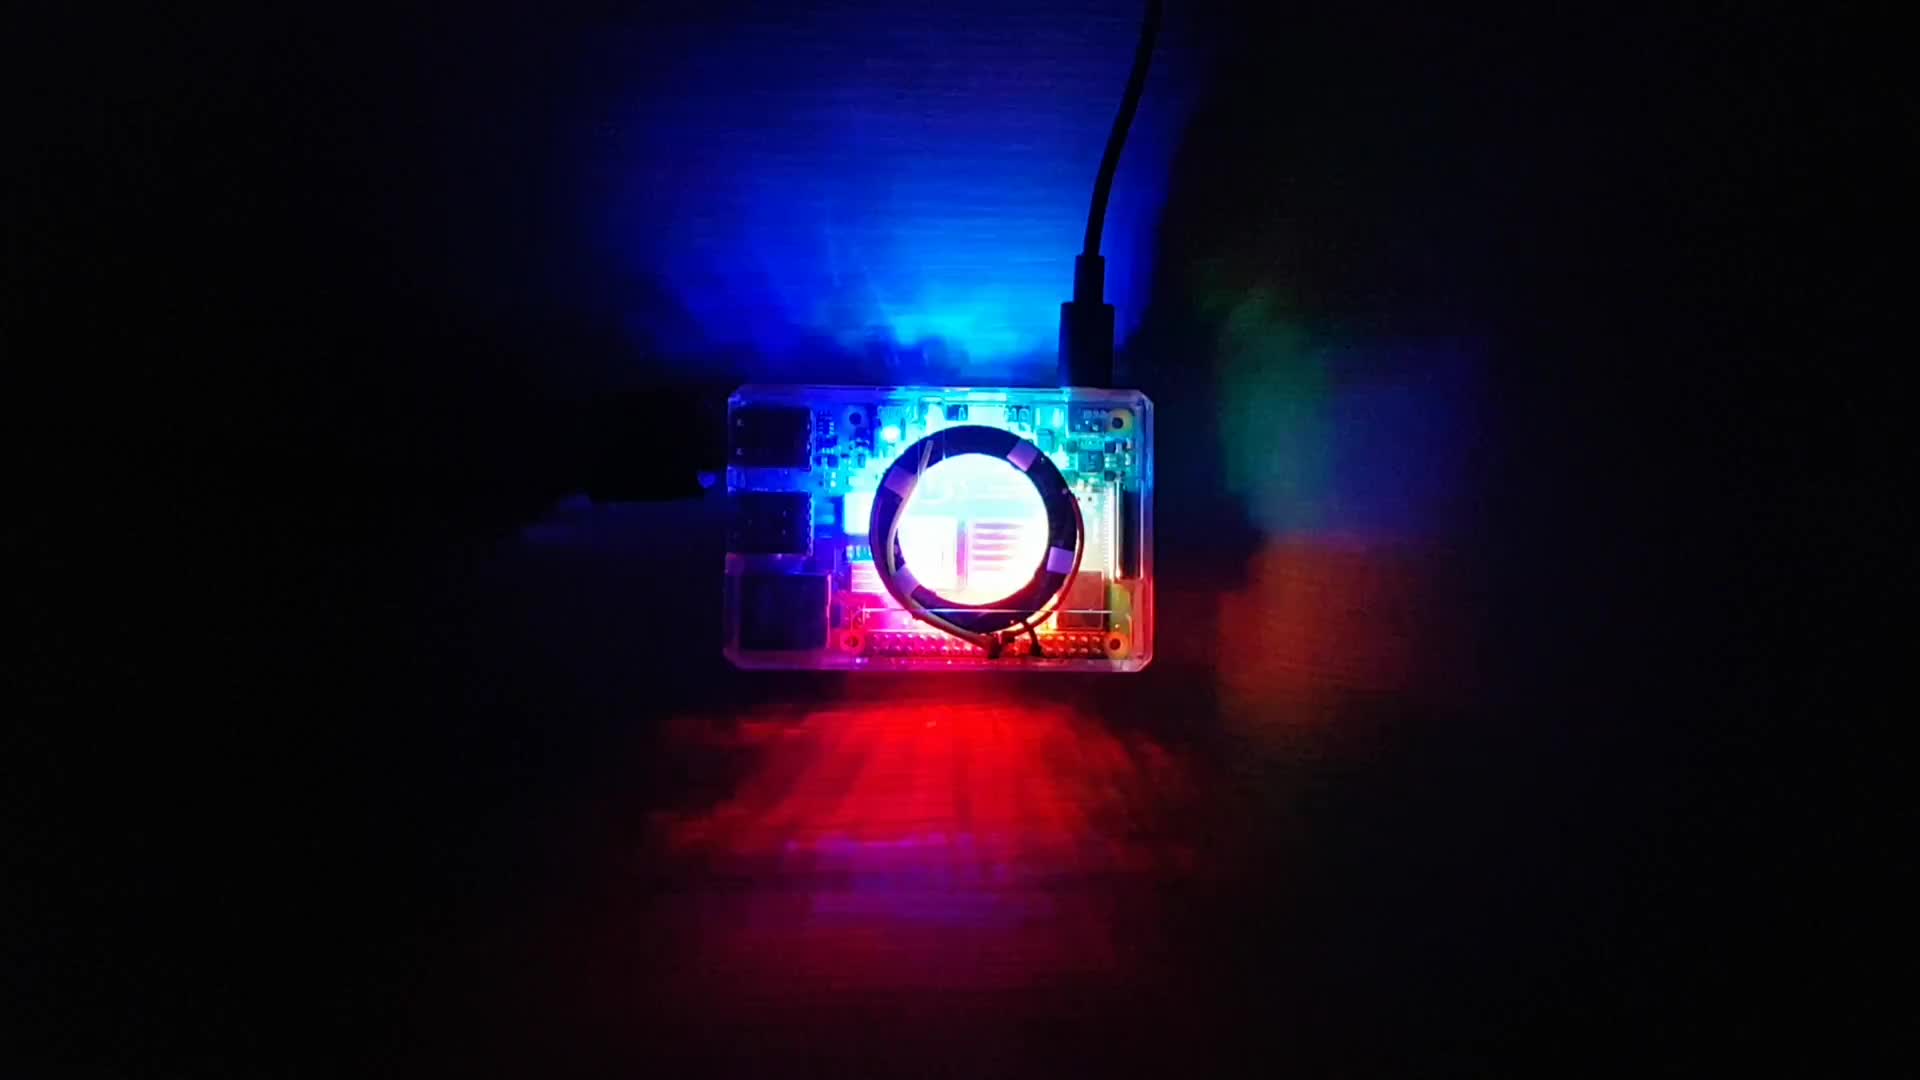
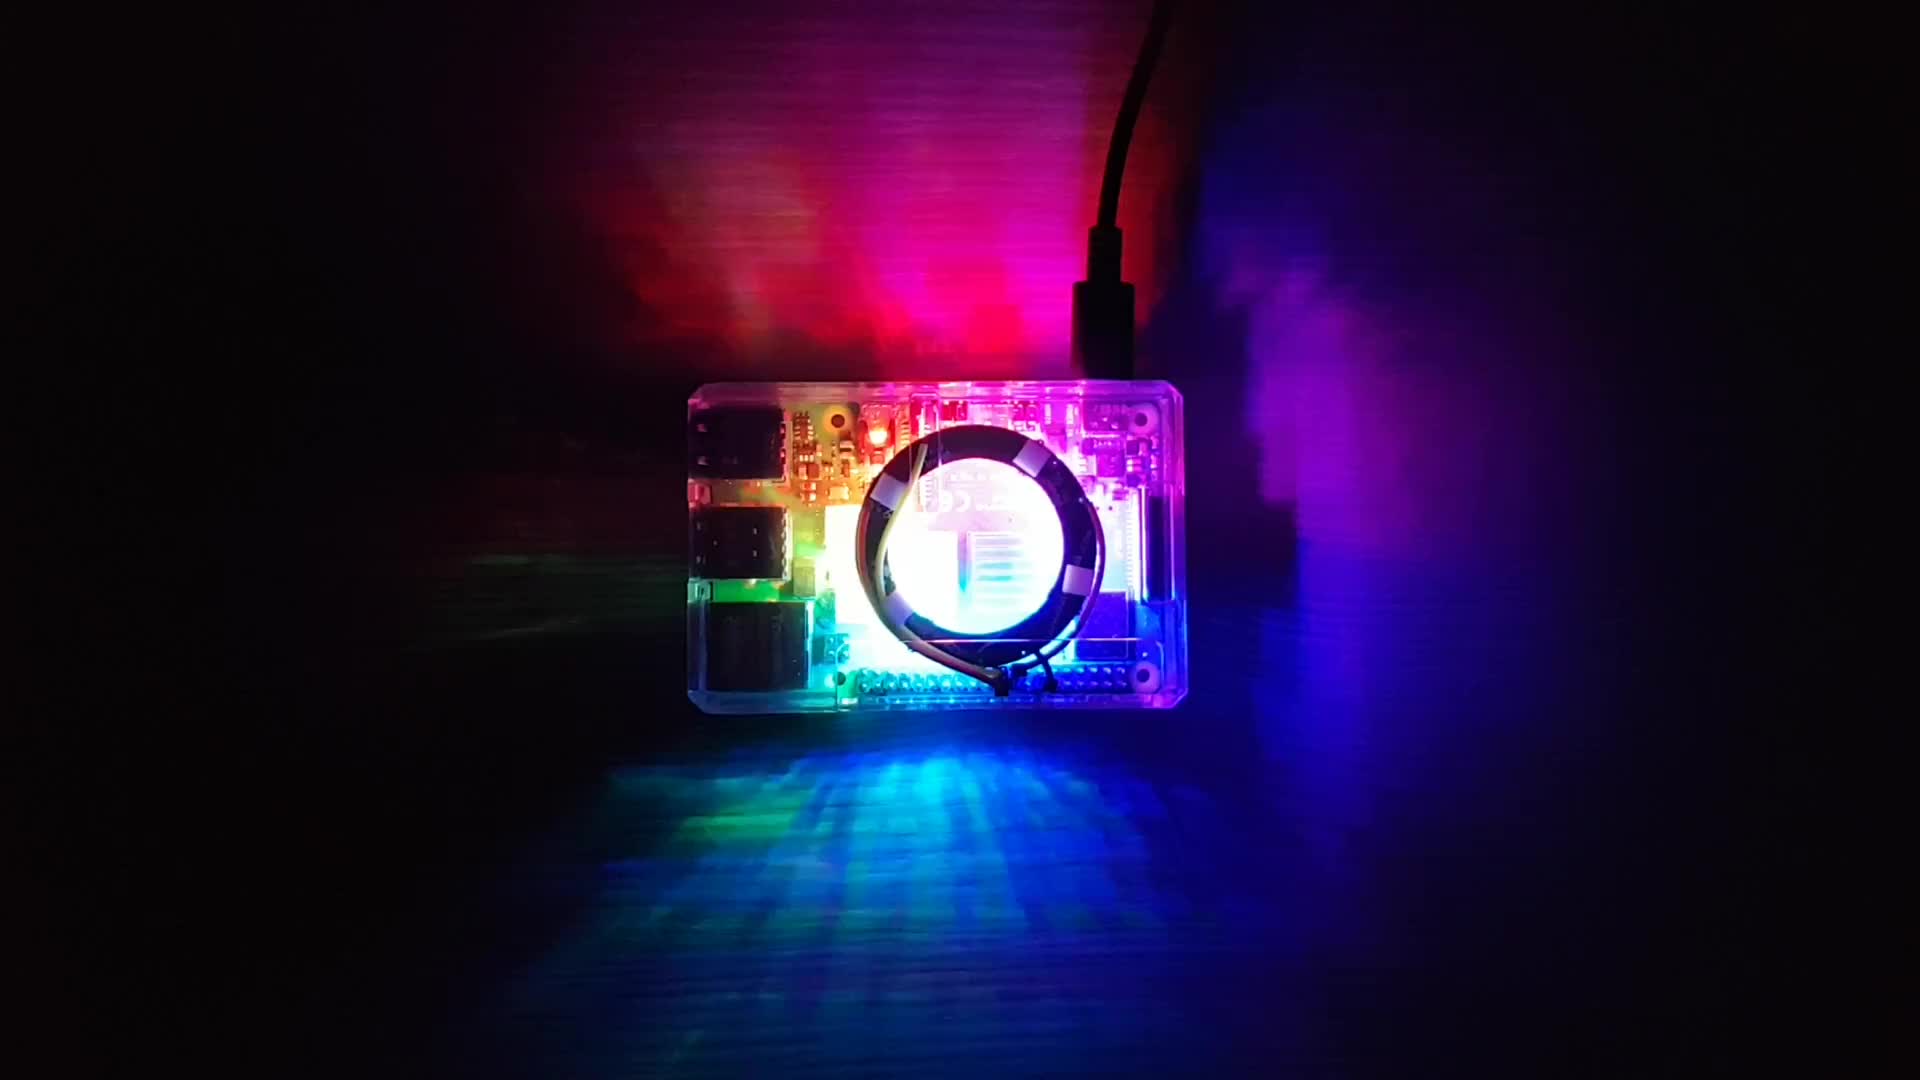
Raveberry is a project that makes parties more fun by allowing everybody to influence the music. With an LED ring in the transparent case of the Raspberry Pi, I tried to make it visually interesting as well. I want to share with you how the ring is connected and controlled, how I made the lights react to the music and how I modified the colors to make them a little more appealing.
Power Supply and Interface
The ring has 16 LEDs and is pretty similar to this one from Adafruit. It is powered directly from a 3v3 Pin, the Pi can handle 16 LEDs without an external power supply. This is very convenient, as it allows me to just leave the ring attached to the case. LEDs usually are powered with 5V, however this leads to problems when controlling them from a Raspberry Pi. The Pi's GPIO pins control the ring with 3.3 volts, and if the difference between power voltage and data voltage is too high, the ring cannot read the data correctly. Thus, either the data voltage needs to be raised with a level converter or the power voltage needs to be reduced. The latter can be accomplished with either a diode between the 5V pin and the ring, or connecting the ring to a pin with lower voltage. Since I like to keep the setup compact, I chose the last option which requires no additional hardware. With 3.3V, the LEDs can not shine quite as bright, but for my use case this is easily enough. You can read more about the possible wiring options in this Adafruit article.
The LEDs are controlled via the SPI interface of the Raspberry Pi. The rpi_ws281x library is used to manage the ring from python code. The library also provides the possibility to control LEDs via PWM or PCM, however this either disables either analog or digital audio output, which is quite disadvantageous for a music server. On a Raspberry Pi 4, there is one thing to look out for: SPI requires a stable clock, and the Pi 4 throttles itself by default. This can be avoided by adding core_freq_min=500 to /boot/config.txt. Raveberry takes care of this during install if you enable LED visualization.
Audio-Reactive Lighting
In the first video, you can see how the LEDs light up to the beat of the music in realtime. In order to produce this effect, multiple steps are necessary. First, mopidy (the music player) duplicates the audio output into a fake pulseaudio sink. cava then captures the audio from this sink and transforms it, splitting it into its frequencies. Raveberry maps these frequencies to colors from red to blue and lights up the LED ring accordingly. Since the transformation takes a short amount of time, the audio output is delayed by approximately that time to sync the light flashes with the beat. All in all, this allows for a pretty neat sound-reactive spectrum visualization on the LED ring.
If you feel the reactive mode is too agitated, you can also make the ring smoothly cycle through all colors in a rainbow pattern:
Color Tweaking
(Caution, math ahead)
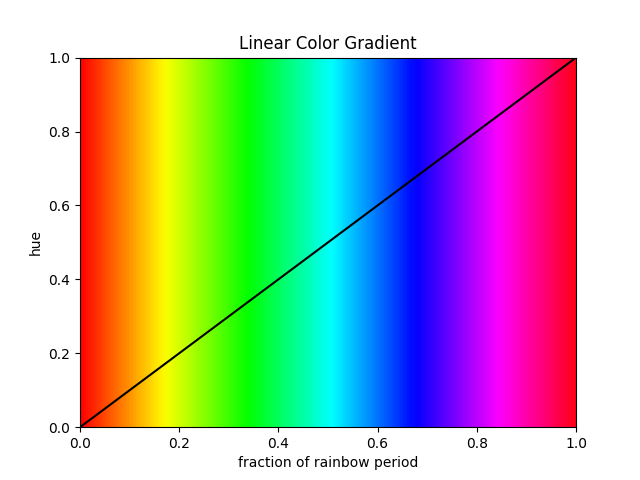
A rainbow can easily be generated with the HSV (Hue, Saturation, Value) color space. By setting saturation and value to 1 and moving the hue from 0 (red) over ⅓ (green) over ⅔ (blue) to 1 (red again), every color is produced. The result is what you see in the graph.
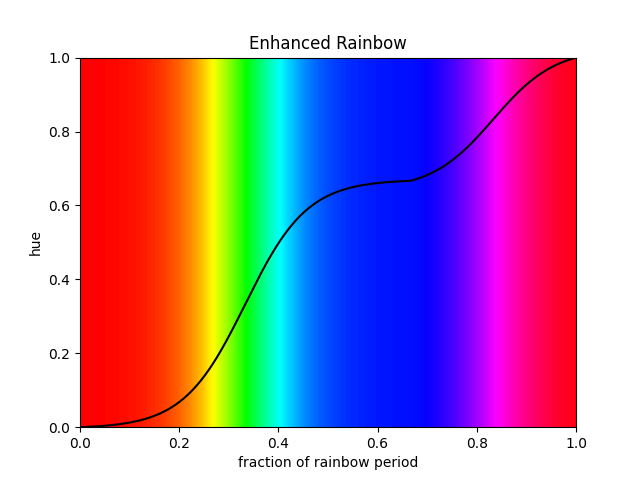
While all colors are spread equally, green is perceived to be much more prominent. This is for two reasons: First, the human eye is the most sensitive at the wavelength of green, so it looks brighter in comparison to other colors of equal intensity. Second, the board of the Raspberry Pi is green, tinting the reflected light slightly green. This is compensated by compressing green with a logistic curve and stretching red and blue. Because pink also does not look that great in the rainbow (in my opinion), it is also compressed a bit. This modified rainbow can be seen in the second video.
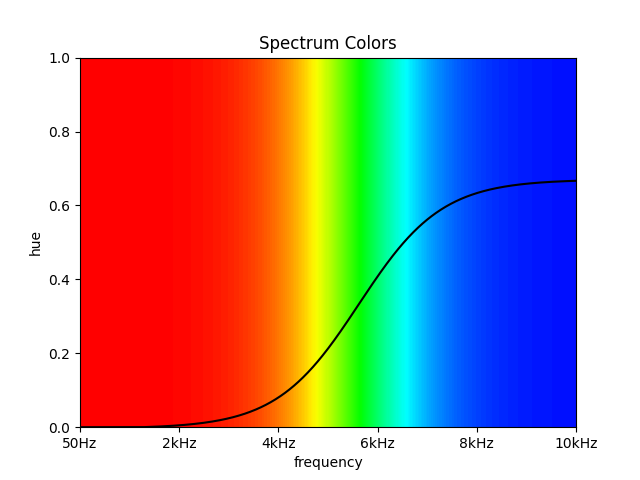
The colors used for the reactive spectrum were tweaked as well. High and low frequencies are quite different and should thus be visually separated as well. With the naive approach, both the lowest and the highest frequencies would map to red, having no visual boundary. To solve this problem, I removed pink from the spectrum completely, leading to an easily distinguishable border between red (low frequencies) and blue (high frequencies). This spectrum was also used in the audio-reactive lighting showcase.
Maybe this inspires some of you to also tinker with LEDs, putting some light to into the dark season.